HOW TO TIE A TURKSHEAD

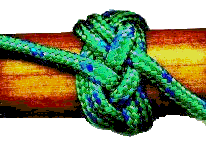
Technically, these are instructions for a three lead, four bight Turkshead, meaning that there are three basic passes around the knot, and it loops up and down four times in going around. There are many, many other types of Turksheads, see the books in the bibliography for descriptions of how to tie the others.

This is, though, the basic Turkshead used as a neckerchief slide, and is sometimes known as the "Woodbadge Woggle." These instructions should be enough to get you started, but practice will always help you in getting a smooth, even knot.

As you follow these instructions, you will want to keep the knot much looser than is shown in the pictures, and keep much more rope free at your working end, or you will never be able to double or triple it. Also, you will want to tie the knot around some sort of form. The picture shows a dowel, though anything, even two fingers, will do.

Some pictures of Turkshead Neckerchief slides I've made, both of this basic form and others, are available here.

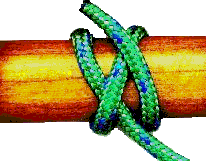
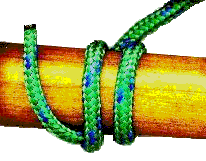
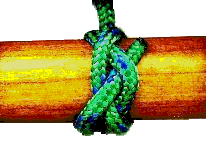
Bring the rope up in front of your form, pass around behind it, and then around front again, crossing over the first pass you made.

turk 1
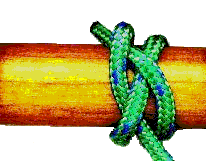
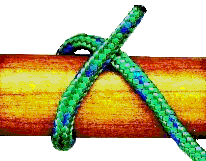
Now take the working end behind the form again, and bring it to the front, crossing your last pass, and parallel to the first one. turk 2
Now tuck the working end under the first pass you made. turk 3
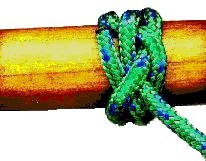
Roll the form toward you. Your working end should now be on the bottom, and your previous work should show two, mostly parallel, ropes. turk 4
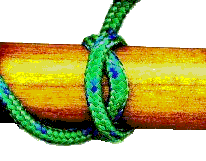
This is the only tricky part. Look for the parallel rope that is furthest from your working end, and pull it over the other rope, making a small opening or eye. turk 5
Now tuck your working end over the first rope, down through the eye you just formed, amd under the second rope. Now take the working end up and over the form. turk 6
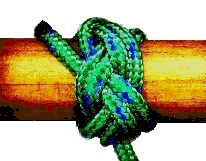
Roll the form back towards you. Believe it or knot, the basic Turkshead is now done! It only has one pass, though, so you will probably want to double or triple it.

Take the working end and tuck it next to your very first rope, and thread it into and out of the knot, always staying exactly next to the first pass you made.
turk 7
This image shows a doubling pass almost completed. Remember, you're just putting one pass right next to the previous one.

Neckerchief slides can be made with a doubled or tripled Turkshead.
turk 8
The ends of a Turkshead should always be hidden, tucked into the knot. One thing I like to do is bring the ends up between two of the passes before tightening the knot.

Tightening the Turkshead is essential, and is done by slowly working the ends through, until it is firm.
turk 9

Once you have completed your Turkshead, you have to do something to help it hold its shape. If it is intended to stay on its form, simply tightening it will probably be sufficient. If you want to take it off the form, you have to try something else. For natural materials (cotton or hemp rope) you can whip the ends to the lines next to them, or spray the whole thing with clear polyurethane varnish.

For artificial rope (nylon, poly) you also have the option of melting the ends to hold them in place. One technique which I like is to put the whole knot, form and all, in the oven at about 400 degrees. For Poly rope, take it out after about ten minutes and for nylon after about 20 minutes. Let it cool, and the whole thing should have melted slightly, and hold its shape.

I've used this technique on a variety of slides with a lot of success. Pictures of some can be seen here.

That's about it! If you have other options, suggestions, or comments, please let me know!
To my chagrin, several sites link directly to this page rather than the root of my knotting site. If you reached this page from a link or search, you may
get to my entire knotting site here,
for animations, bibliographies, knotting knives, links, and more.

Last Updated 30 April 2003. © 2003 Alan L. Folsom, Jr.